My wife recently inherited an antique Singer sewing machine manufactured in 1927 (there are several websites where you can look up the serial number and it will give you the model number as well as where and when that particular sewing machine was manufactured).
The machine is a Singer model 66-4. Originally it was my wife's grandmother's machine and it was also the sewing machine that my wife learned to sew on when she was a young girl, which is why she wanted me to refurbish it and bring it back to working condition. When we got it, it was a bit rough having been stored in less than ideal conditions for the last 25 years or so. The mechanical aspects seemed to work without any binding and virtually all the part were there including a full set of add-on accessories for special types of stitches and such. The only parts that were missing was the cover over where the bobbin is installed, the belt (it's a treadle-driven sewing machine), a small screw, one of two holding the front mechanism cover in place as well as needing to replace the rubber 'tire' for the bobbin winder (I found multiple sources on the web for the parts that I needed).
Here's a couple of pictures showing you what it looked like before I started the project about six weeks ago:

Here's a closer look at the head where you can see that it has seen a lot use over the years:

First I removed all of the inter-workings and then striped the paint off the head. Once I get the paint removed and everything sanded-down and clean I repainted it and applied new decals (I found a place that sold the original so-called 'Filigree' style decals, which was the theme for this machine).
In addition to the original owners manual that was still with the machine, I downloaded copies of the original factory parts list with pictures of each part, as well as exploded views of the mechanisms. I also managed to find a detailed set of instructions on how to 'time' and adjust the mechanisms. I also took lots of pictures as I disassembled the parts and after de-greasing and cleaning the parts, I packaged them in Ziploc bags to keep them sorted and in logical groups.

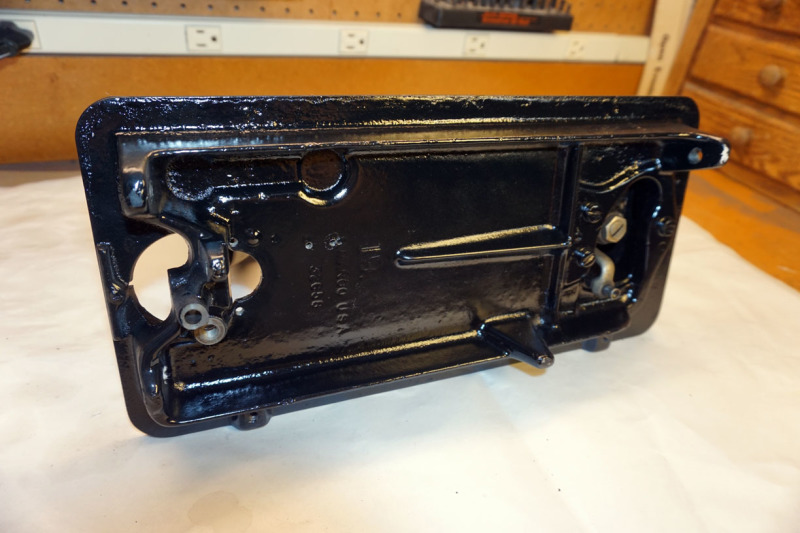
As for the head, I stripped-off all the paint, sanded the bare metal and finally rinsed and de-greased it as well.


As you can see, the casting of the body was rather rough and on the back side there was some significant porosity so I first applied two coats of Dupli-Color Sandable Automotive Primer, fully sanding both coats, then a single coat with a very light sand. Then two good coats of Black Dupli-Color Acrylic Enamel. Then I applied all the decals and after they had set and dried, I applied two coats of Dupli-Color 'Clearcoat' Gloss.

The hardest, or at least the most tedious, task was masking/plugging all of the threaded holes, oil holes, slide-ways and other openings in the head. This included the bottom which I also gave two coats of paint and a coat of 'clearcoat', but no primer as I didn't take the bottom-side down to raw metal as the shapes are just way too complicated.
As for the cast-iron treadle and base parts, I sent those out to be sandblasted after which I gave them the same Primer/Black Enamel/Clearcoat treatment that I did the head, only in this case I had to hand paint the gold trim on the 'Singer' logos.
I then completely disassembled the cabinet, stripping off the old finish, taking it down to bare wood.

I used a light Pecan stain and then finished it with semi-gloss polyurethane. My wife says we have too much 'Oak' in our house and didn't want anything as red as Cheerywood. Also the traditional 'Early American' stains were just too dark.
Anyway, I just put the final touches on the sewing machine and it has turned-out pretty good, if I do say so myself.

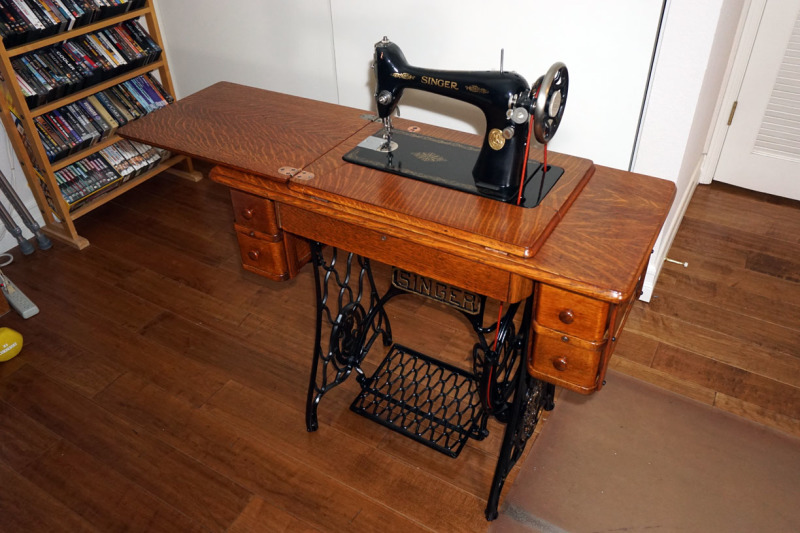

Note that I haven't tried to sew anything yet so there might still be some fine-tuning required but so far everything appears to be working.
